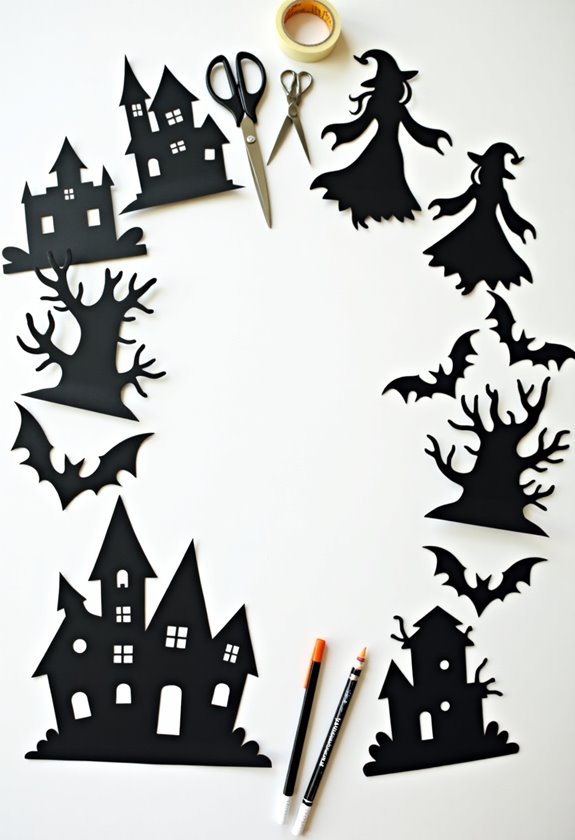
You'll create enchanting Halloween window displays using simple black paper silhouettes that cast spooky shadows. Start with basic materials: black cardstock, craft knife, scissors, and adhesive tape. Design your scene with classic Halloween elements like bats, cats, and haunted houses, then carefully cut your patterns using sharp tools on a cutting mat. Position your silhouettes inside clean windows using removable adhesive, and place lights 3-4 feet behind them for dramatic effect. Protect your creations from weather with clear sealant and secure corners with painter's tape. There's so much more to discover about bringing these haunting scenes to life.
Key Points
- Use black cardstock paper and precision cutting tools to create clean-edged silhouettes of classic Halloween designs like bats, cats, and haunted houses.
- Position a bright light source 3-4 feet behind the window display to create dramatic backlighting for maximum impact.
- Secure silhouettes inside windows using removable adhesive or putty after thoroughly cleaning the glass surface.
- Plan multi-layered scenes with background elements like moons and foreground details to create depth in your window display.
- Protect paper silhouettes from moisture by spraying with clear acrylic sealer and reinforcing edges with clear packing tape.
Required Materials and Tools
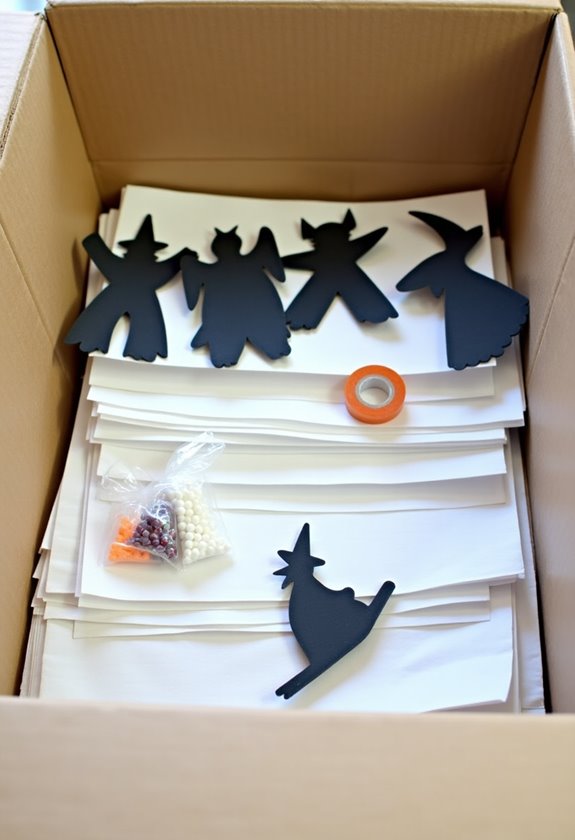
Before getting started with your spooky paper silhouettes, gather these essential materials: black cardstock or construction paper, white printer paper for backing, a sharp craft knife or precision scissors, a pencil, a ruler, and adhesive tape.
You'll also want to have a cutting mat to protect your work surface, and it's helpful to keep some spare paper on hand in case you need to make adjustments. If you're planning to use a craft knife, you'll find that a self-healing cutting mat is absolutely worth the investment for clean, precise cuts.
Don't forget to prepare your workspace with good lighting – you'll need it to see your pencil lines clearly on the dark paper. A clean, flat surface gives you the best results, and you might want to keep some paper towels nearby for quick cleanup. While they're optional, transfer paper and stencils can make your project easier, especially if you're new to creating silhouettes. Remember, having all your tools organized before you begin will make the creative process so much smoother and more enjoyable.
Planning Your Window Design
Now that you've gathered your materials, let's map out your window display. Before cutting any paper, take a moment to measure your window dimensions carefully, noting both the height and width. You'll want to sketch your design on regular paper first, making sure your spooky scenes will fit perfectly within your window frame.
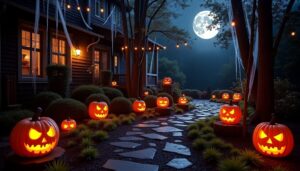
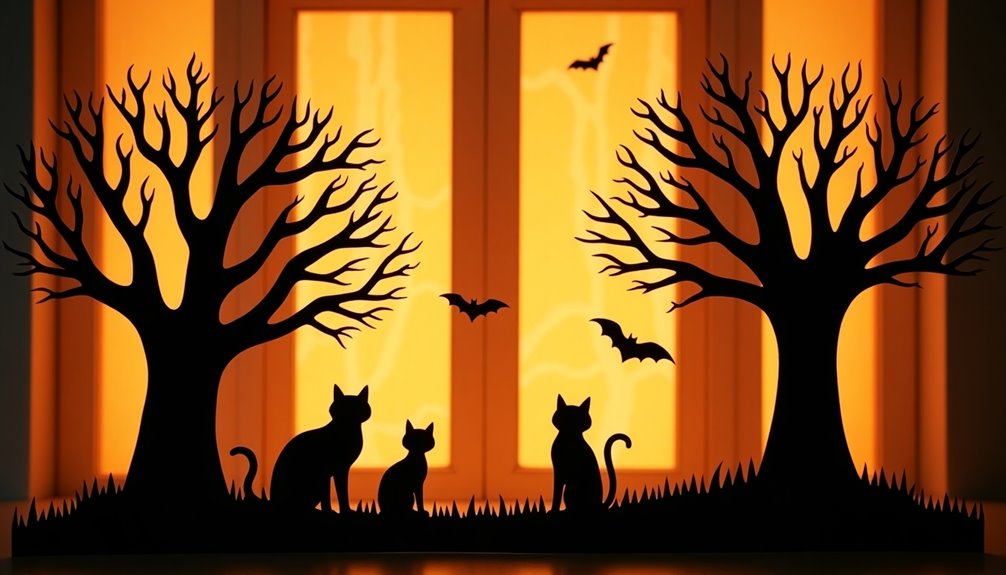
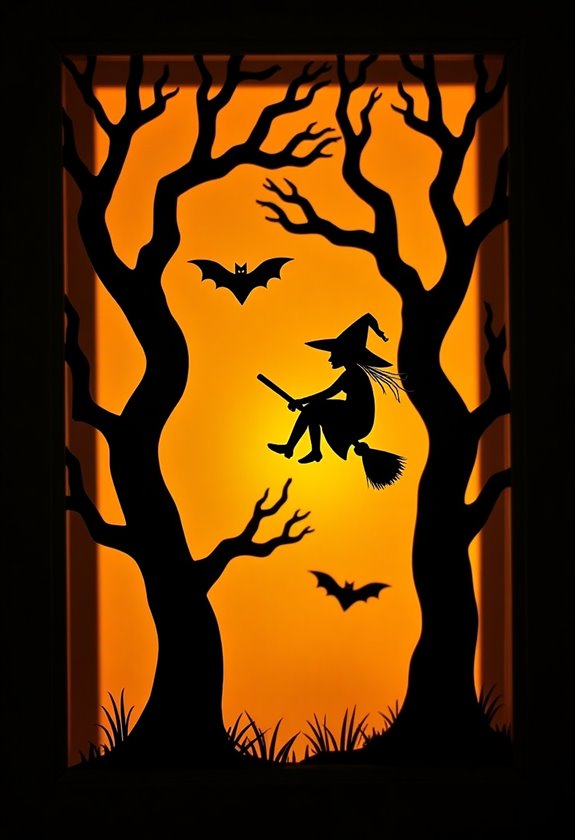
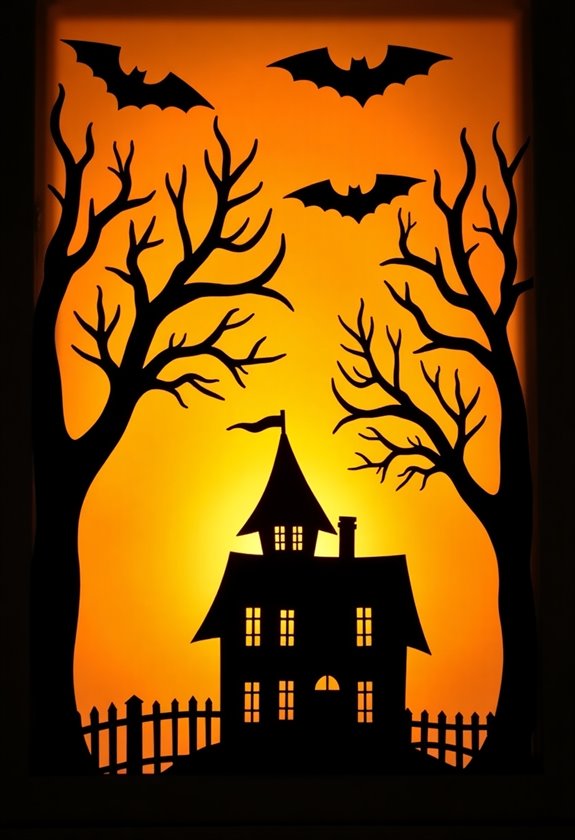
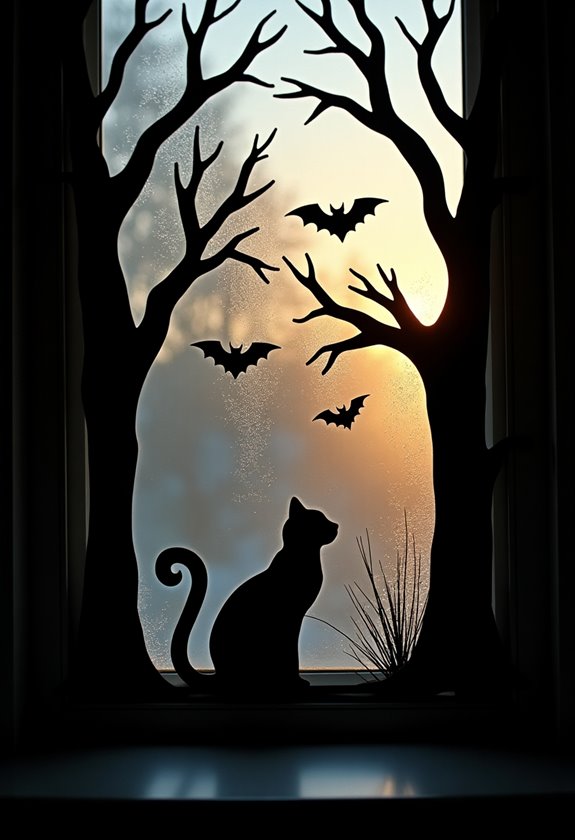
Think about what Halloween elements you'd like to showcase. Popular choices include flying bats, creepy trees with twisted branches, prowling cats, or a haunted house silhouette. You can create depth in your display by planning different layers – perhaps a moon in the background, trees in the middle, and smaller creatures in the foreground.
Don't forget to reflect on how your silhouettes will look from both inside and outside your home. The best designs are striking from the street but won't overwhelm your indoor space. If you're working with multiple windows, try planning a story that flows from one window to the next. You can start with a peaceful cemetery scene that builds to a spooky haunted house finale.
Choosing Spooky Silhouette Patterns
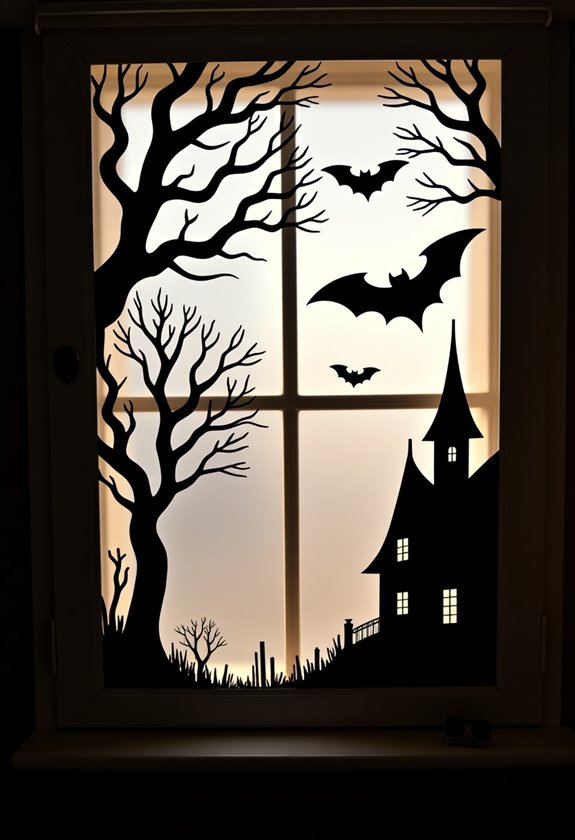
Selecting the right patterns for your Halloween window display can make or break the overall effect. You'll want to choose silhouettes that are both recognizable from the street and match your desired level of spookiness. Classic options include witches on broomsticks, haunted houses with crooked windows, and gnarled trees with reaching branches.
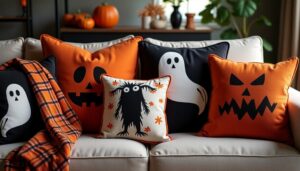
For a family-friendly display, you can’t go wrong with playful black cats, smiling jack-o’-lanterns, and friendly ghosts floating about. If you’re aiming for something more dramatic, consider incorporating gothic elements like cemetery gates, towering gravestones, or perched ravens. Don’t forget that size matters – you’ll need larger silhouettes for bigger windows, while smaller spaces work well with more delicate designs. If you’re looking to add a contemporary twist to your Halloween display, consider incorporating modern black and white decor to create a chic and stylish look. This could include sleek black cats silhouetted against a white background, or minimalist jack-o’-lantern designs in contrasting colors. By combining traditional Halloween elements with modern design, you can create a unique and eye-catching display that will impress both kids and adults alike.
Try mixing different heights and depths to create an engaging scene. A full moon backdrop can tie your design together, while smaller elements like bats or fallen leaves can fill empty spaces naturally. Remember, it's perfectly fine to combine pre-made patterns with your own designs – your creativity will make the display uniquely yours.
Cutting Techniques for Paper
Precision is essential when cutting paper silhouettes for your Halloween display. You'll want to start with the right tools: a sharp craft knife, a self-healing cutting mat, and a ruler to guarantee clean, straight lines. Don't forget to gather some spare blades, as they'll dull quickly when cutting through paper.
Begin by securing your pattern to the black paper using small pieces of tape at the corners. You'll find it's easier to work from the center outward, and remember to hold your knife at a 45-degree angle for the smoothest cuts. When you're working on intricate details, like spider webs or bat wings, take your time and use short, controlled strokes rather than trying to cut in one long motion.
For curved lines, it's best to turn the paper rather than your knife, keeping your cutting hand in a comfortable position. If you make a small mistake, don't worry – you can often disguise it by carefully trimming the edges. Keep your free hand well away from the cutting path, and always cut away from yourself for safety. You'll be amazed at how your careful cutting transforms simple paper into spooky masterpieces.
Attaching Silhouettes to Windows
With your silhouettes carefully cut, it's time to mount them on your windows for maximum spooky impact. You'll want to gather clear double-sided tape, removable mounting putty, or temporary window clings to guarantee your decorations stay put without damaging the glass. Make sure to clean your windows thoroughly with glass cleaner first, as any dirt or residue will prevent proper adhesion.
Start by positioning your silhouettes on the inside of your windows, stepping outside periodically to check how they look from the street. You'll create the best effect by placing them where they'll be backlit by indoor lighting after dark. If you're using tape, apply small pieces around the edges and a few spots in the middle for larger designs. For mounting putty, roll tiny balls and place them strategically around the silhouette's perimeter. Press each piece firmly but gently against the glass, smoothing out any air bubbles or wrinkles. Don't worry if you need to reposition them – that's why we're using temporary adhesives. Your spooky scenes will look especially dramatic when illuminated from behind on Halloween night.
Lighting Your Window Display
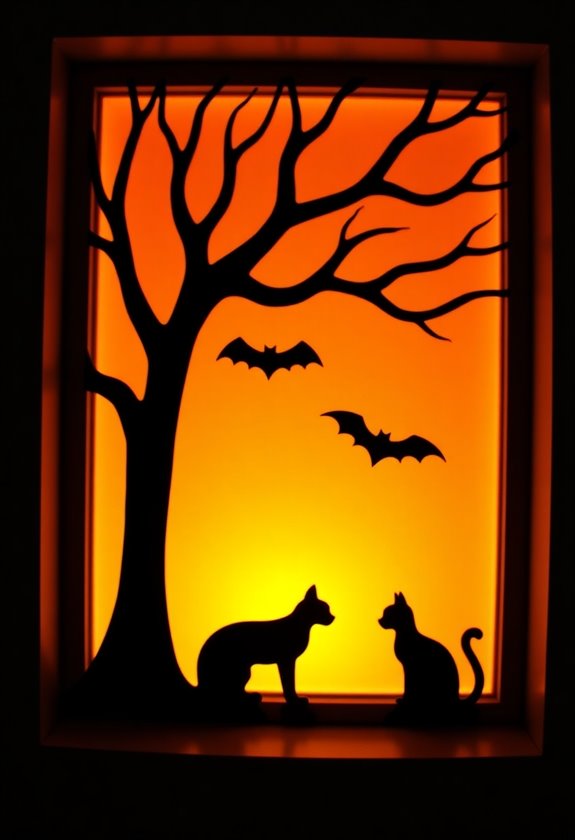
Proper lighting can make or break your spooky window silhouettes. You'll want to create a dramatic backlight that makes your paper cutouts stand out against the darkness outside. The best way to achieve this effect is to position a bright light source about 3-4 feet behind your window display, allowing the light to spread evenly across the entire surface.
For the most striking results, you'll need to evaluate your lighting options carefully. A floor lamp with a white bulb works wonderfully, and you can adjust its height and angle until you get the perfect effect. If you're working with multiple windows, you might want to use separate lights for each display to guarantee consistent illumination. LED lights are an excellent choice because they don't get hot and use less electricity than traditional bulbs.
Don't forget to test your lighting at night before Halloween arrives. You can step outside to see how your display looks from the street, making adjustments to the light's position until you're thrilled with the results. Remember, the darker it is outside, the more dramatic your silhouettes will appear.
Weather-Proofing Your Decorations

Anyone who's displayed paper decorations knows they can be vulnerable to moisture and wind. To protect your spooky silhouettes and keep them looking their best throughout the Halloween season, you'll need to take a few simple precautions that make a big difference.
Start by spraying both sides of your paper silhouettes with clear acrylic sealer, which creates a moisture-resistant barrier while maintaining the paper's flexibility. Once the sealer dries, reinforce the edges of your designs with clear packing tape to prevent tearing. You'll want to attach your silhouettes to the window using removable adhesive strips rather than tape, as they're stronger and won't damage your glass.
For extra protection against condensation, place a thin sheet of clear plastic between your paper silhouette and the window. This creates an additional barrier that keeps moisture from seeping into your artwork. If you're expecting particularly stormy weather, you can temporarily secure the corners with small pieces of painter's tape, which won't leave residue when removed. Remember to check your displays regularly and make adjustments as needed to guarantee they stay secure and beautiful.
Can Sophisticated Halloween Table Ideas Incorporate Spooky Paper Silhouettes for Windows?
Sophisticated halloween spells can definitely be woven into your table decor with spooky paper silhouettes for windows. Create an eerie atmosphere with intricate cutouts of witches, bats, and other ghastly figures. These haunting silhouettes can add a touch of sophistication to your Halloween table setting for a truly spooky celebration.
Creative Theme Ideas

Beyond the basic haunted house scenes, paper silhouettes offer endless possibilities for creating themed window displays that'll make your home stand out. You can transform your windows into enchanting storybook scenes, featuring witches brewing potions or black cats prowling under a full moon. For a classic horror theme, try recreating iconic movie monsters like vampires rising from coffins or werewolves howling at the night sky.
If you're looking to create something unique, consider developing a fairy tale gone wrong theme, where princesses become witches and castles appear delightfully decrepit. You might also want to explore a spooky forest scene, complete with twisted trees, owls, and eerie floating lanterns. For those who love the Victorian era, you can design elaborate gothic scenes with ornate architecture and mysterious figures in period clothing.
Don't forget that you can combine themes to tell your own story. Perhaps your silhouettes could show a witch's academy, complete with broomstick flying lessons and cauldron chemistry class, or create an underwater graveyard with skeletal merpeople and ghostly shipwrecks.
Storage and Reuse Tips
Preserve your spooky paper silhouettes by storing them flat between sheets of acid-free tissue paper in a large portfolio or art folder. This careful storage method will help prevent creasing, tearing, and yellowing, ensuring your decorations stay in perfect shape for next Halloween.
When you're ready to pack up your silhouettes, carefully remove any tape residue from the windows and gently dust each piece with a soft brush. You'll want to label each silhouette's position in your display, making it easier to recreate your spooky scene next year. If you've created multiple window displays, keep the pieces for each window grouped together with paper clips or in separate folders.
Store your portfolio in a cool, dry place away from direct sunlight and moisture. A closet shelf or under-bed storage container works perfectly. Don't forget to add silica gel packets to prevent moisture damage, and keep your storage container elevated if it's in a basement. With proper care, your paper silhouettes will last for many Halloweens to come, bringing that magical spooky atmosphere to your home year after year.